Sell Products on Your Website & Members App
Learn how to make products available for purchase on your website and in the members app, and how the buying experience works for guests and members.
Written By Isaac Buchanan
Last updated 11 days ago
Products can be sold through two customer-facing channels: your Gymflow website pages and the Members App. Each is set up separately, and you can use one or both.
Sell on Your Website
Step 1: Show Products in Your Website Navigation
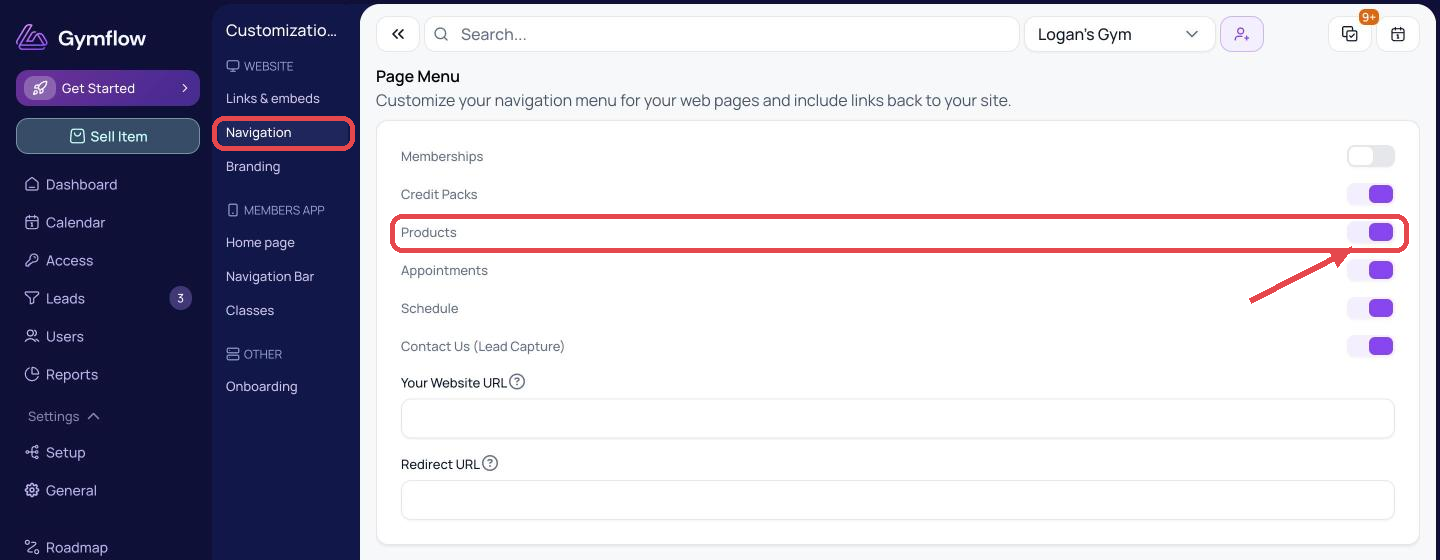
Go to Settings > Customizations > Navigation.
Turn on the Products toggle. It saves automatically.
Step 2: Turn On Website Purchases for Each Product
Each product has to be enabled for web sales individually.
Go to Settings > Setup > Products.
Turn on the On Web toggle for the product, directly in the list.
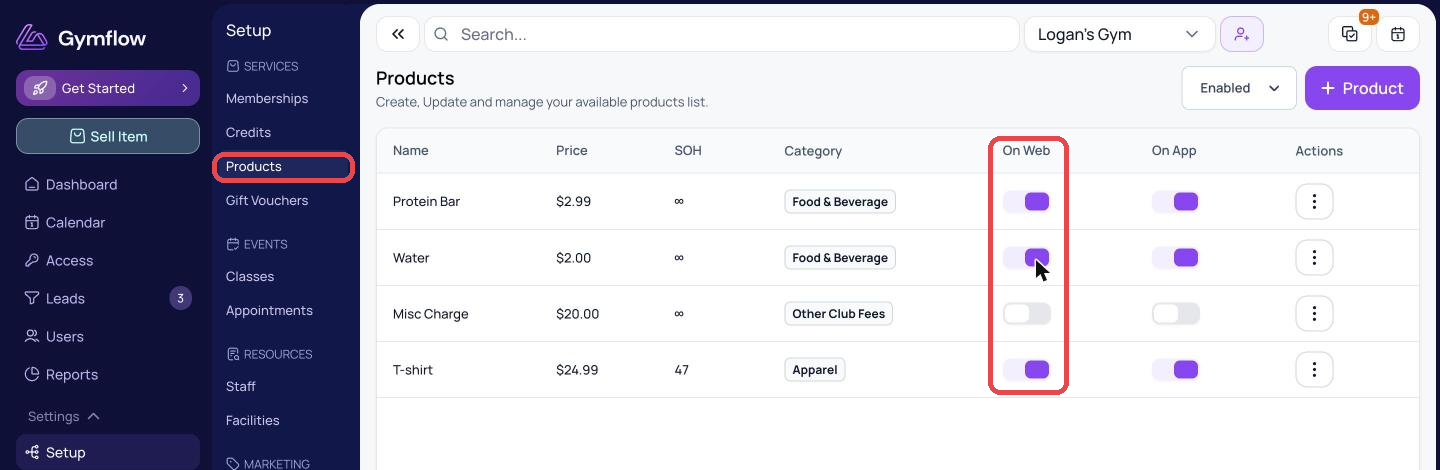
Products with On Web turned off are hidden from your online shop, but staff can still sell them in the portal or Staff App.
Step 3: Share Your Products Page
Go to Settings > Customizations > Links & embeds and find the Products row:
Link: a direct URL for your main website, link in bio or social media.
Code: embed the shop directly into a page on your existing website.
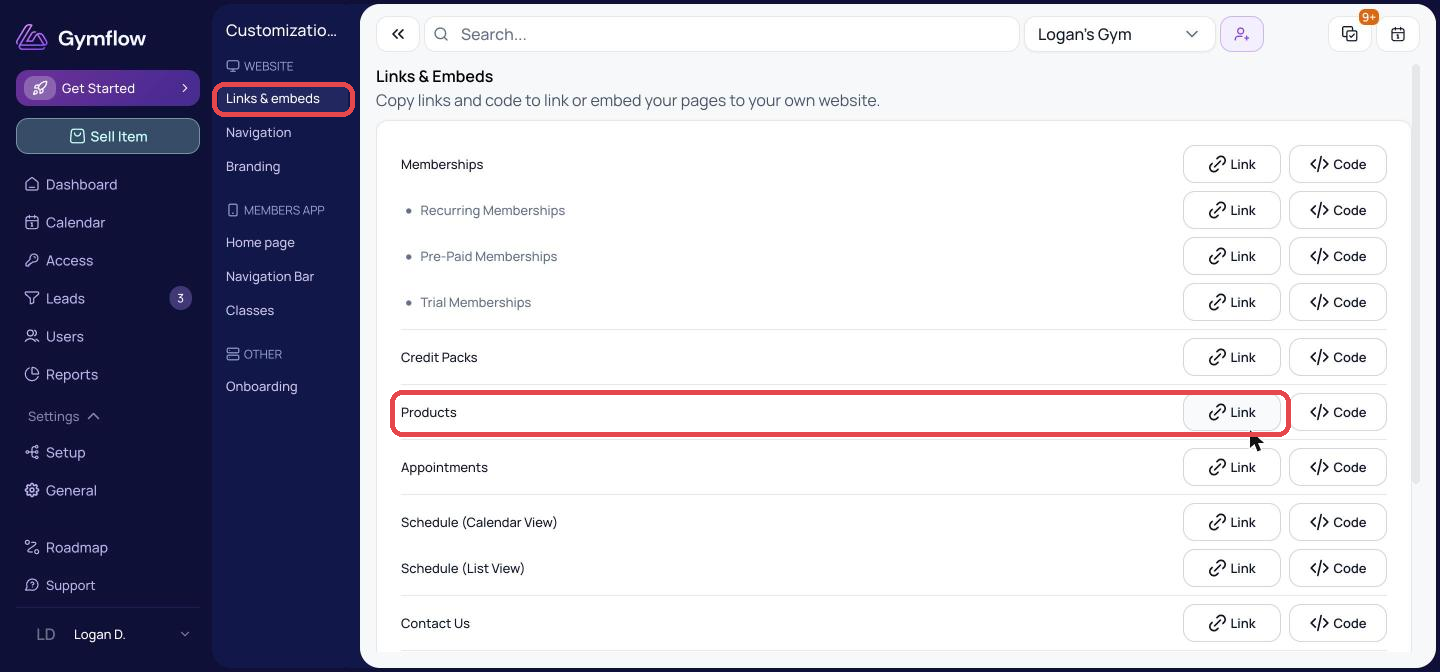
If you turned on Products in Step 1, the shop also appears in your Gymflow website navigation.
How the Web Buying Experience Works
No login wall for browsing: anyone can browse your products and add them to their cart without signing in. Sign-in only appears at checkout, and the cart is kept.
Member pricing applied automatically: if a product has a Members Price, members get it as soon as they sign in at checkout. Non-members see the standard price.
Everything in one place: purchases go into the same invoices, payment methods, tax settings and sales reports you already use.
Member pricing is set per product with the Members Price toggle in Settings > Setup > Products. See Members-Only Offerings for details.
Sell in the Members App
Step 1: Turn On the Shop Tab
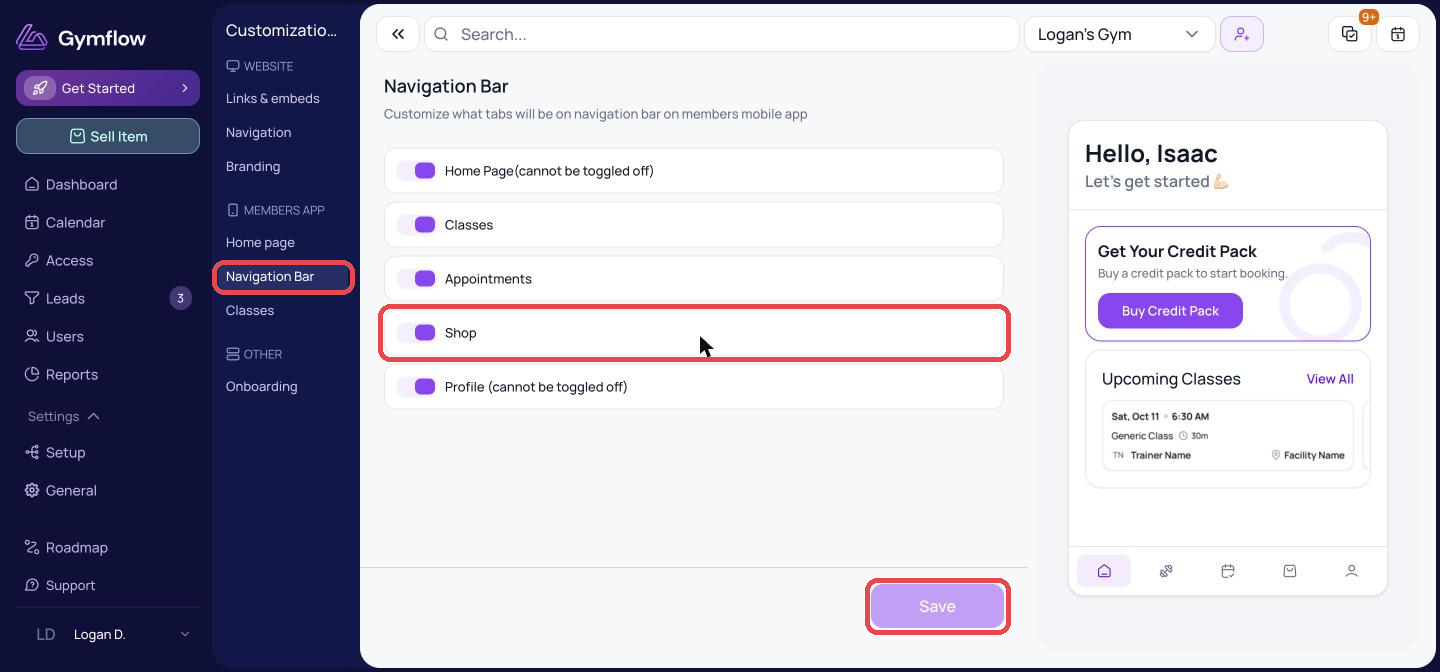
The Members App has a Shop tab where members can buy everything available at your club in one place: memberships, credit packs, products and gift vouchers.
Go to Settings > Customizations > Navigation Bar.
Turn on Shop.
Click Save.
Step 2: Turn On App Purchases for Each Product
Go to Settings > Setup > Products.
Turn on the On App toggle for the product, directly in the list.
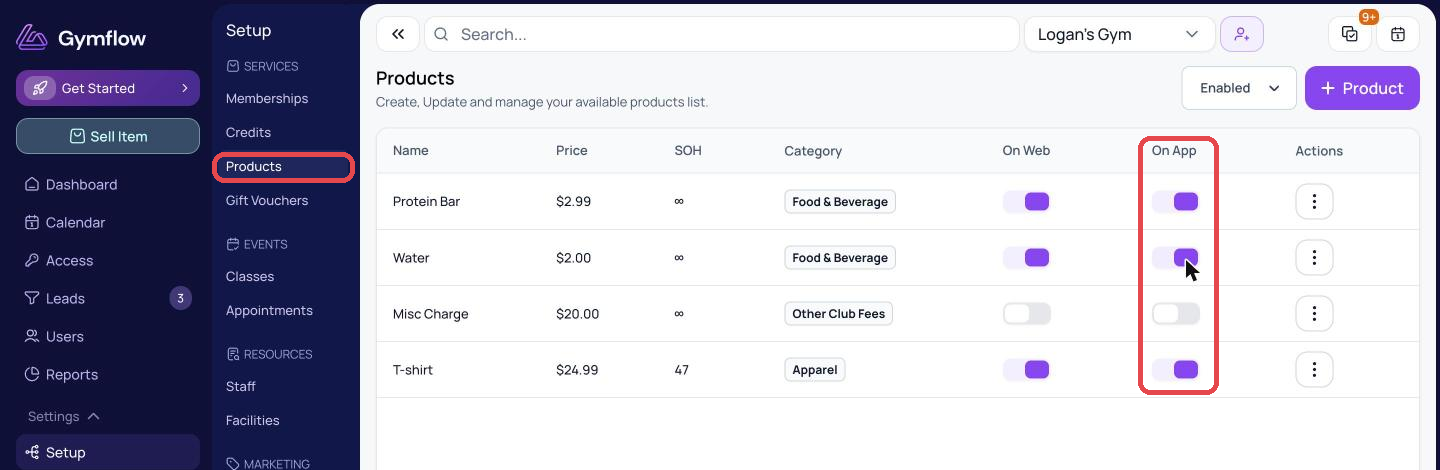
On App and On Web are independent, so a product can be on one channel, both or neither.
Share a Link to One Product
Go to Settings > Setup > Products.
Click the three dots next to the product and select Copy Link.
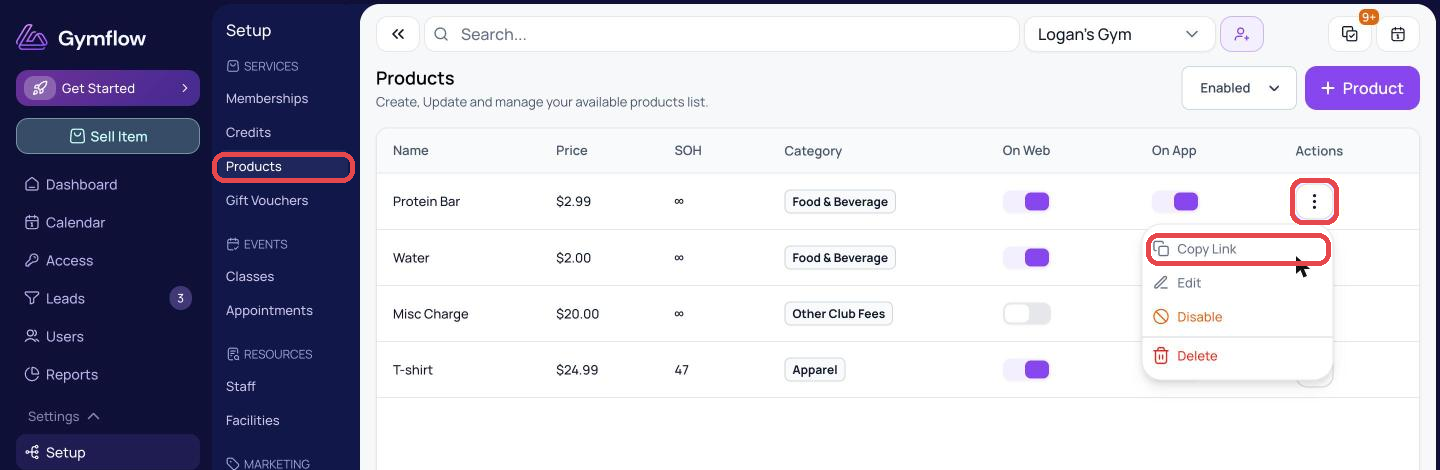
Copy Link only works for products with On Web turned on.
After a Customer Places an Order
Products bought online are collected at your club. Orders start as Pending, and customers can track them under My Orders in the Members App and Customer Portal. When you hand the items over, mark the order as fulfilled. See Fulfill Product Orders for the steps and how refunds work.
Was this helpful?
Still need help? Share an idea